> ## Documentation Index
> Fetch the complete documentation index at: https://docs.brm.ai/llms.txt
> Use this file to discover all available pages before exploring further.
# Ramp Integration
> Description of your new file.
### Requirements
* Have `Admin` or `IT Admin` role in Ramp
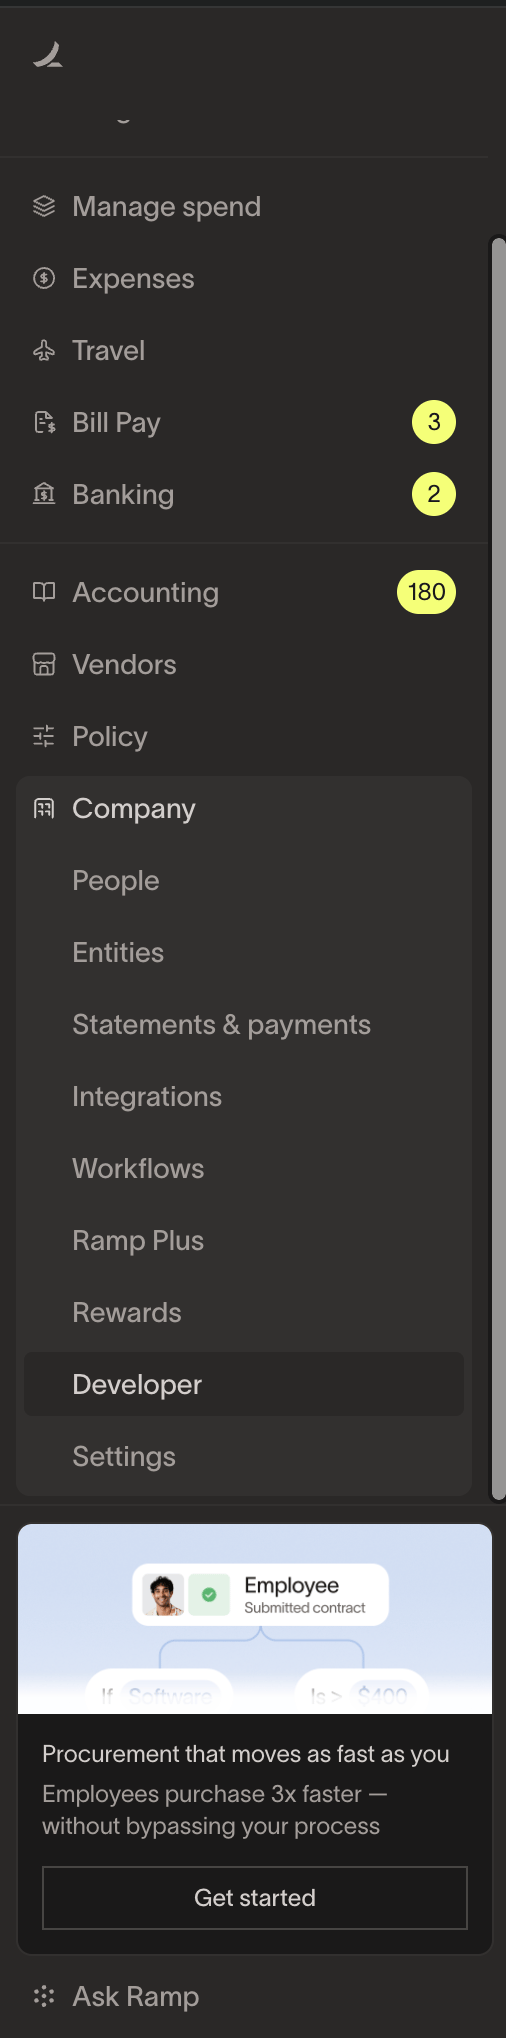
### Step 1: In Ramp navigate to Company, and click on `Developer`
 ### Step 2: Create a new app
1. Click `Crate new app`
2. Name the app and add a description
### **Step 3: Change the app’s grant type to “Client Credentials”**
1. Click on the app that you just created (in this demo `BRM Integration`)
2. Delete the default grant type that is `Authorization Code`
3. Add a new grant type that is `Client Credentials`
### Step 4: Configure the app’s scopes by enabling the following permissions
1. In your app config, scroll down to `Configure required scopes`
2. Toggle the following scopes on
1. bills:read
2. cards:read
3. cards:write
4. limits:read
5. limits:write
6. memos:read
7. receipts:read
8. reimbursements:read
9. transactions:read
10. users:read
### Step 5: Enter the Ramp app’s Client ID and Client Secret into BRM
1. Head to BRM and navigate to your integrations (Settings —> Integrations)
2. Add Ramp as an integration
3. Copy over the `Client ID` and `Client Secret` from your Ramp app into your BRM modal
For more information, and if any of these steps appear to have changed within Ramp, you can [view Ramp's instructions here](https://support.ramp.com/accessing-the-developer-api/).
### Step 2: Create a new app
1. Click `Crate new app`
2. Name the app and add a description
### **Step 3: Change the app’s grant type to “Client Credentials”**
1. Click on the app that you just created (in this demo `BRM Integration`)
2. Delete the default grant type that is `Authorization Code`
3. Add a new grant type that is `Client Credentials`
### Step 4: Configure the app’s scopes by enabling the following permissions
1. In your app config, scroll down to `Configure required scopes`
2. Toggle the following scopes on
1. bills:read
2. cards:read
3. cards:write
4. limits:read
5. limits:write
6. memos:read
7. receipts:read
8. reimbursements:read
9. transactions:read
10. users:read
### Step 5: Enter the Ramp app’s Client ID and Client Secret into BRM
1. Head to BRM and navigate to your integrations (Settings —> Integrations)
2. Add Ramp as an integration
3. Copy over the `Client ID` and `Client Secret` from your Ramp app into your BRM modal
For more information, and if any of these steps appear to have changed within Ramp, you can [view Ramp's instructions here](https://support.ramp.com/accessing-the-developer-api/).