> ## Documentation Index
> Fetch the complete documentation index at: https://docs.brm.ai/llms.txt
> Use this file to discover all available pages before exploring further.
# Okta SSO
> This guide provides information on how to set up Okta as an IdP for BRM.
### **Supported Features**
* `IdP Initiated Auth Flow`: Single Sign-On (SSO) using OpenID Connect (OIDC) initiated via Okta.
* `SP Initiated Auth Flow`: SSO using OIDC initiated via Okta Dashboard or Okta Browser Plugin.
### **Prerequisites**
Ensure that you have the following:
* A BRM organization
* A BRM account in that organization with admin privileges
* An Okta account with admin privileges
### **Configuring Okta for SSO**
Step 1: Add the BRM application from the public app catalog
1. Log in to the Okta portal as an administrator.
2. Click `Applications` from the left side menu to expand options
3. Click `Applications` from the expanded menu
4. Click `Browse App Catalog`
5. Search for BRM and click on the `BRM` tile
6. Click `(+) Add Integration` which will take you to the `General Settings` tab,
7. Choose the name by which you want to identify the application, by default it is BRM.
8. Click the `Done` button
9. You will be redirected to the `Assignments` tab, here you can assign users or groups that need access to BRM
10. On the application page, go to the `Sign-On` tab and copy your `Client ID` and `Client Secret` (you will have to send this information to us later).
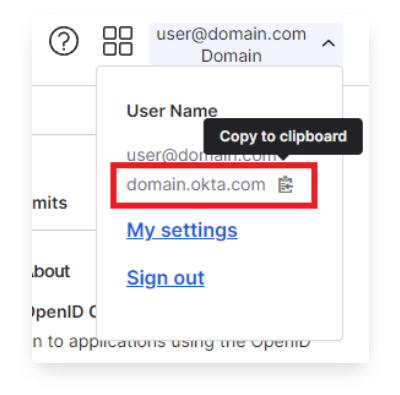
11. Copy `Okta Domain` found by clicking on your username in the top right corner of the Admin Console.
 **Step 2: Enter the application’s client credentials in BRM**
1. Login to your BRM with an admin account
2. Click on your profile in the top right and click on **Settings**
3. Click on Security on the left navigation
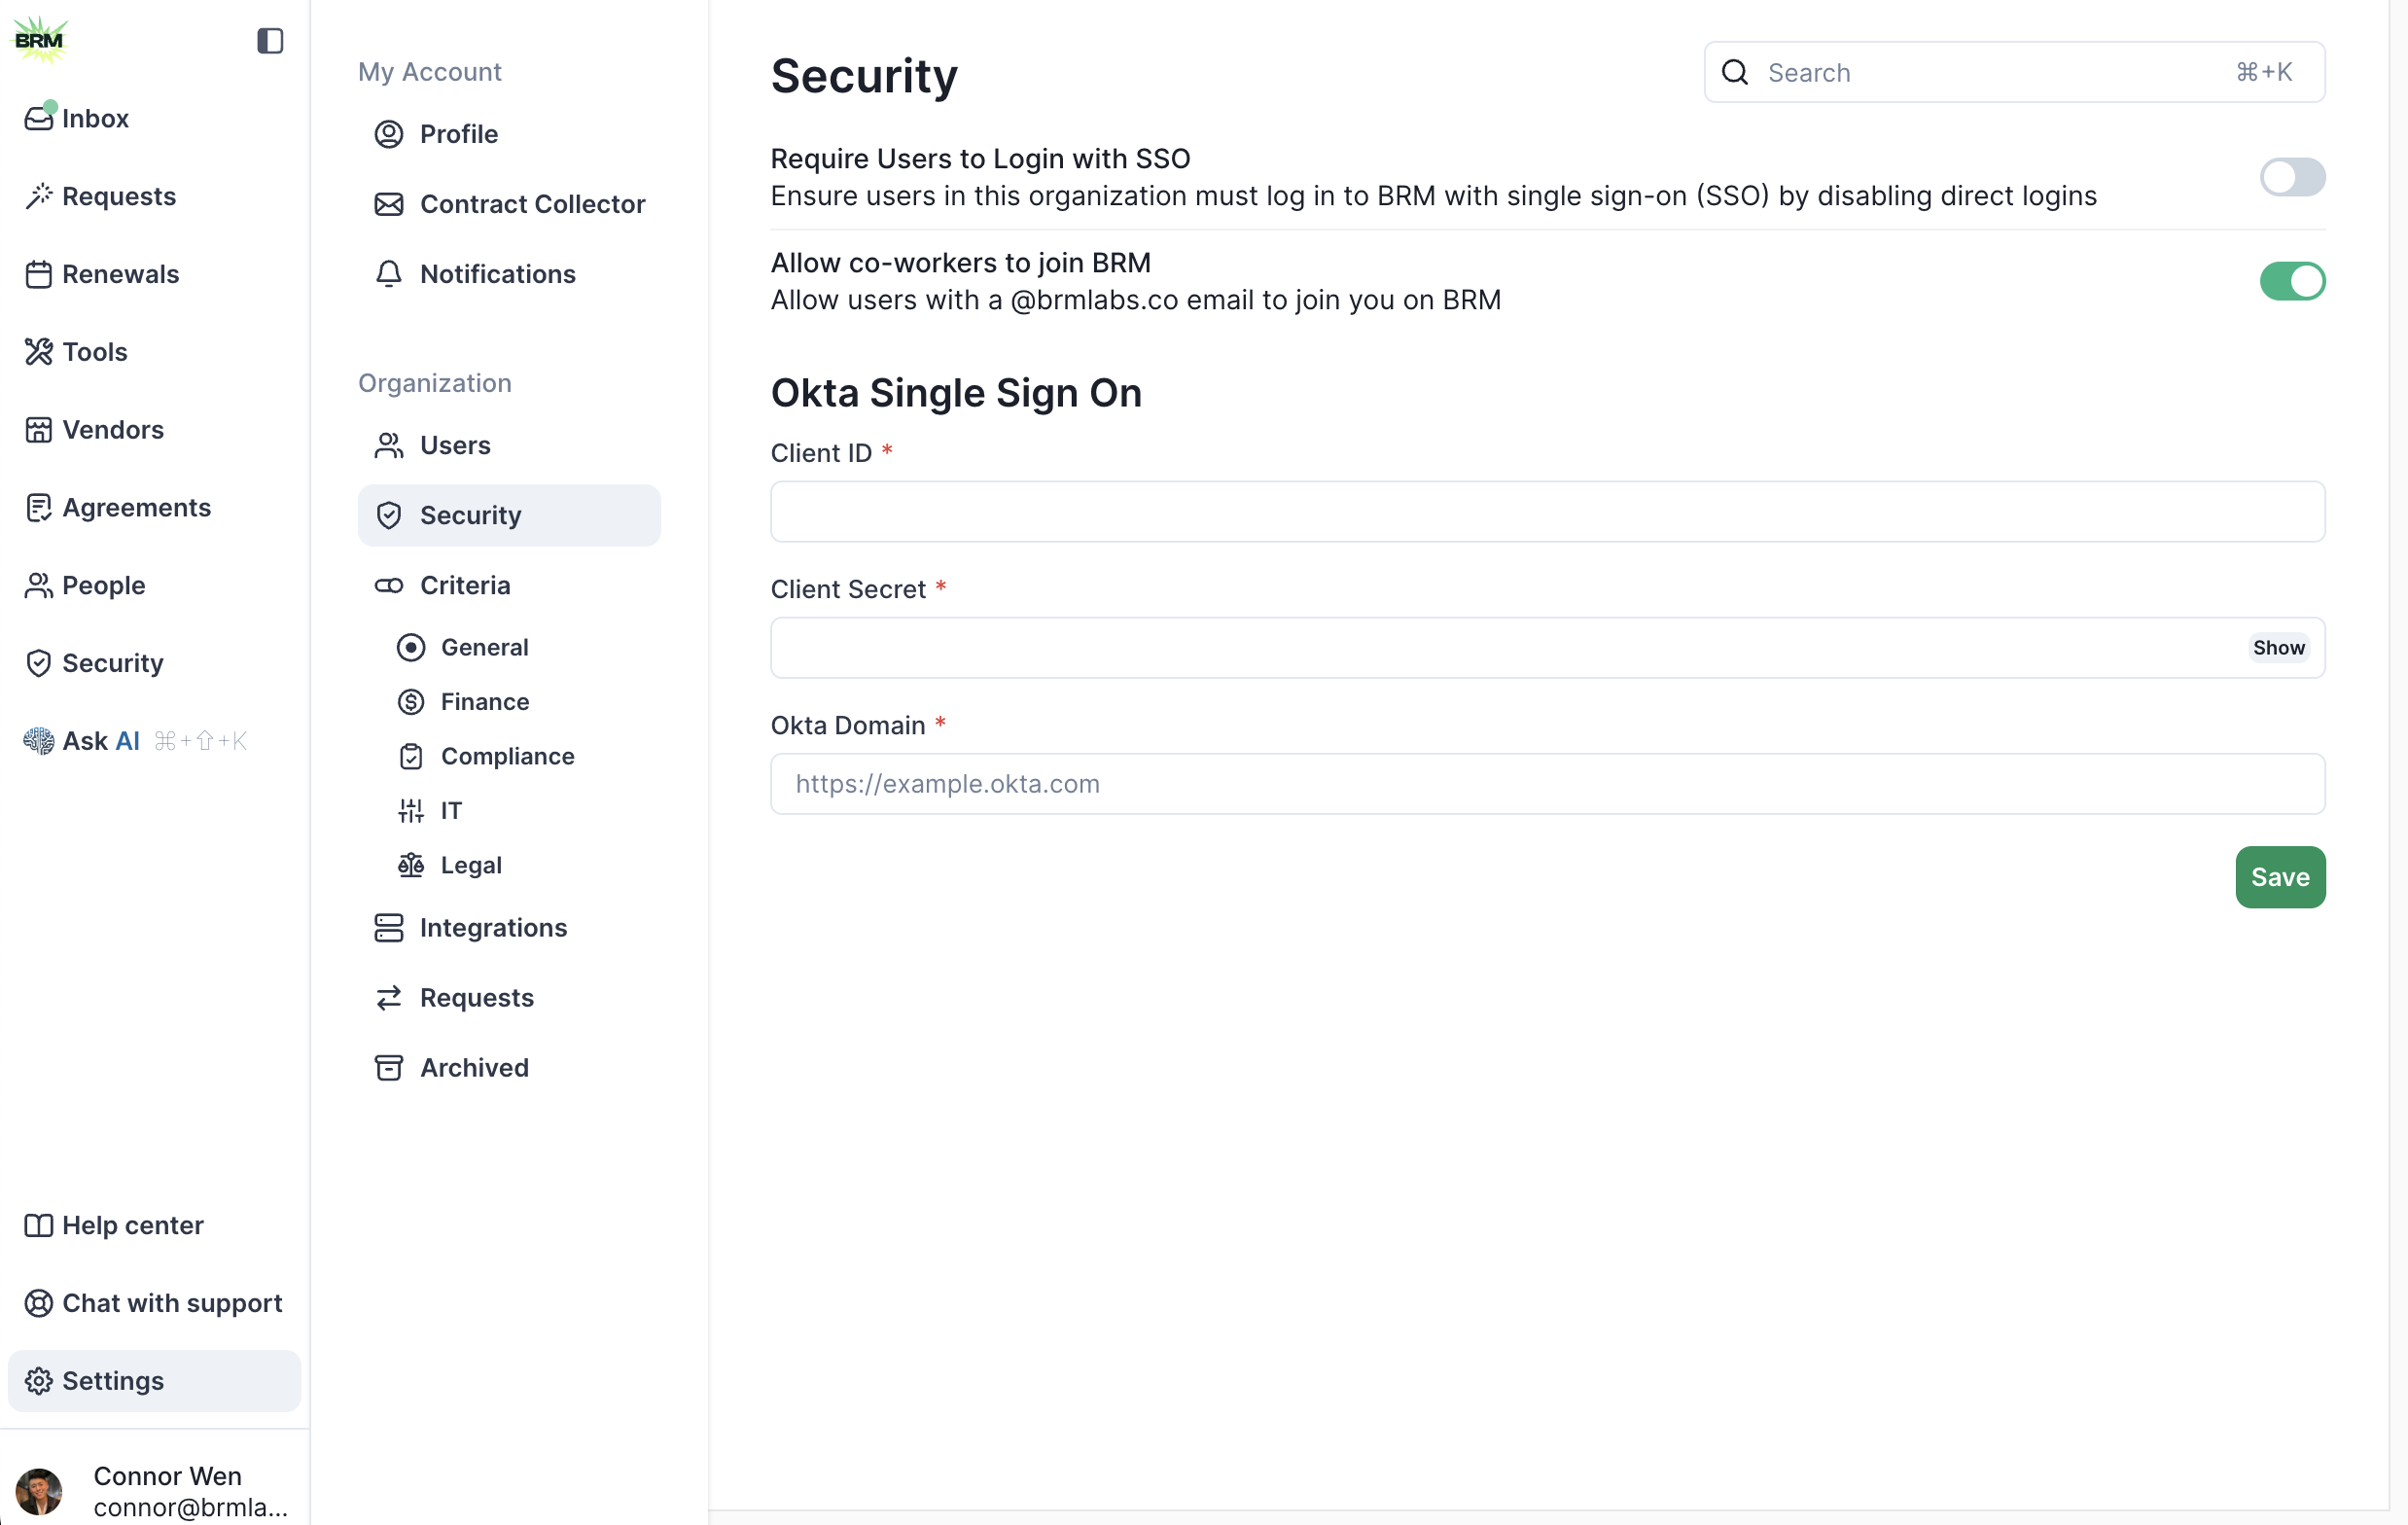
4. Fill in the Client ID, Client Secret, and Okta domain that you copied earlier (use the copy to clipboard buttons in Okta). Be sure to drop the `-admin` in your Okta domain e.g. [https://brmlabs-admin.okta.com/](https://brmlabs-admin.okta.com/) —> [https://brmlabs.okta.com/](https://brmlabs.okta.com/)
5. Hit “Save”
**Step 2: Enter the application’s client credentials in BRM**
1. Login to your BRM with an admin account
2. Click on your profile in the top right and click on **Settings**
3. Click on Security on the left navigation
4. Fill in the Client ID, Client Secret, and Okta domain that you copied earlier (use the copy to clipboard buttons in Okta). Be sure to drop the `-admin` in your Okta domain e.g. [https://brmlabs-admin.okta.com/](https://brmlabs-admin.okta.com/) —> [https://brmlabs.okta.com/](https://brmlabs.okta.com/)
5. Hit “Save”
 Congratulations! Okta SSO is now enabled in your BRM org. To sign in with Okta during BRM login at [https://app.brmapp.net/login](https://app.brmapp.net/login), click the “Sign in with Okta” button or use the app tile in Okta.