Supported Features
IdP Initiated Auth Flow: Single Sign-On (SSO) using OpenID Connect (OIDC) initiated via Okta.SP Initiated Auth Flow: SSO using OIDC initiated via Okta Dashboard or Okta Browser Plugin.
Prerequisites
Ensure that you have the following:- A BRM organization
- A BRM account in that organization with admin privileges
- An Okta account with admin privileges
Configuring Okta for SSO
Step 1: Add the BRM application from the public app catalog- Log in to the Okta portal as an administrator.
- Click
Applicationsfrom the left side menu to expand options - Click
Applicationsfrom the expanded menu - Click
Browse App Catalog - Search for BRM and click on the
BRMtile - Click
(+) Add Integrationwhich will take you to theGeneral Settingstab, - Choose the name by which you want to identify the application, by default it is BRM.
- Click the
Donebutton - You will be redirected to the
Assignmentstab, here you can assign users or groups that need access to BRM - On the application page, go to the
Sign-Ontab and copy yourClient IDandClient Secret(you will have to send this information to us later). - Copy
Okta Domainfound by clicking on your username in the top right corner of the Admin Console.

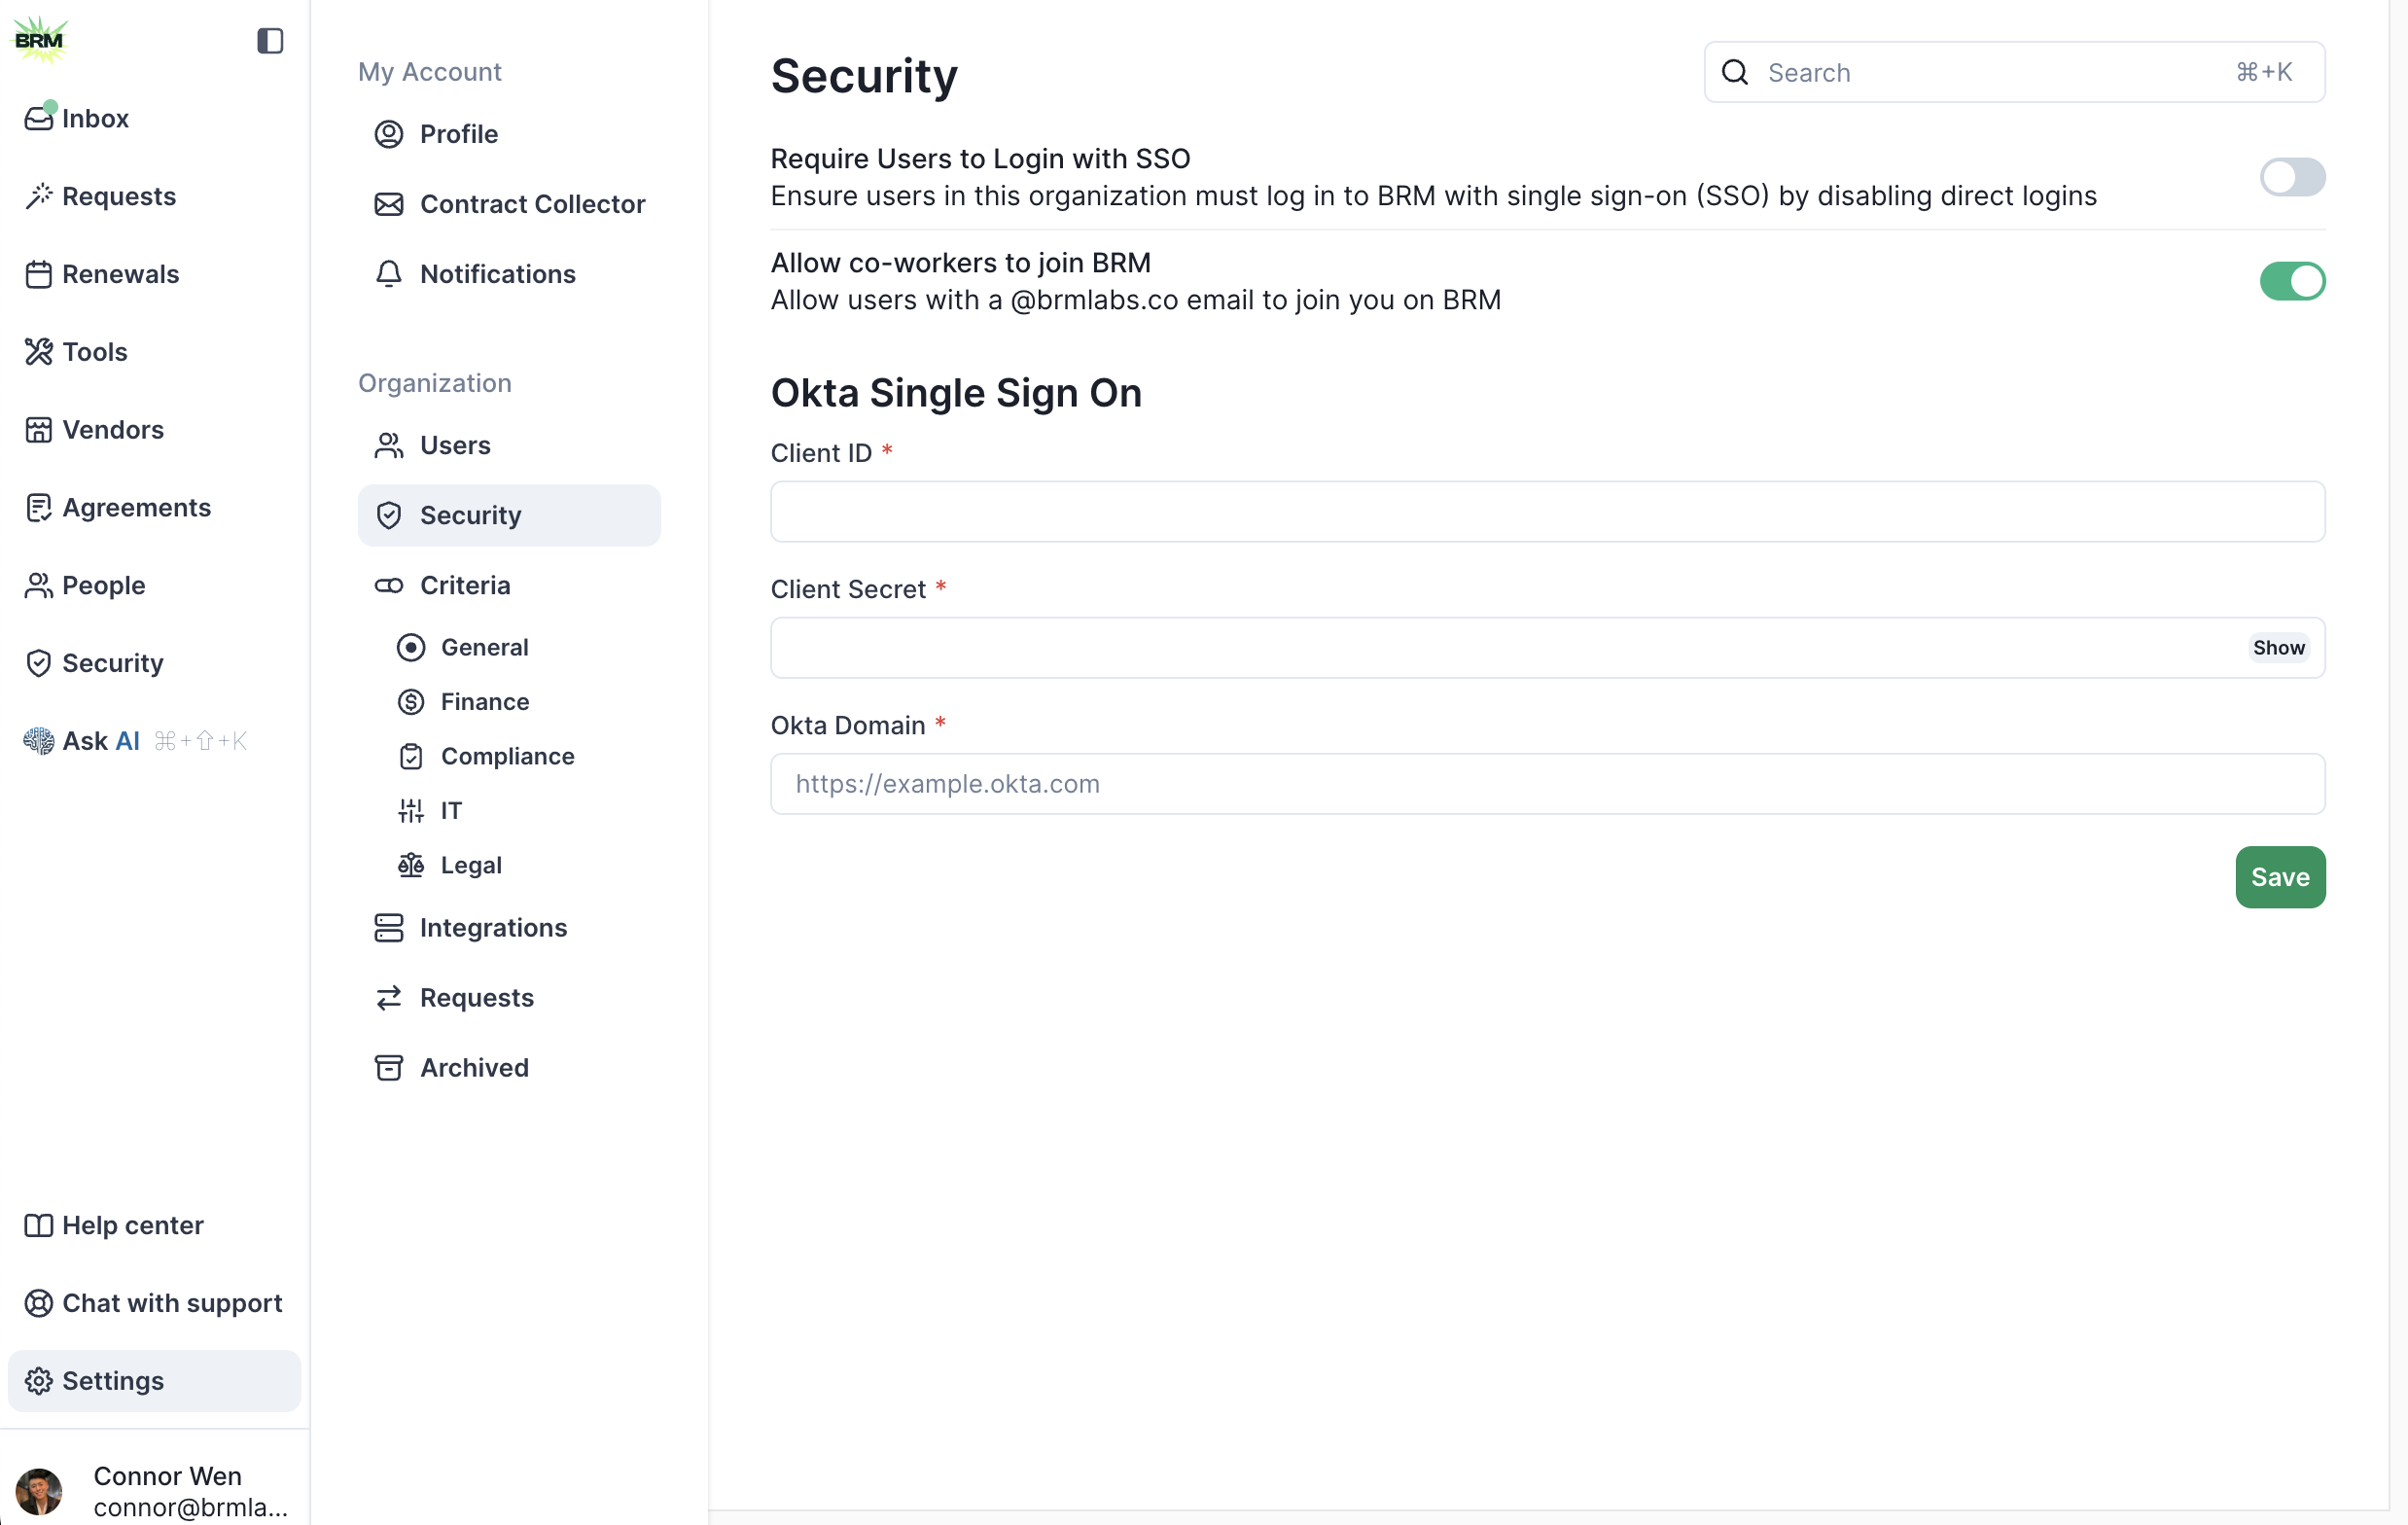
- Login to your BRM with an admin account
- Click on your profile in the top right and click on Settings
- Click on Security on the left navigation
-
Fill in the Client ID, Client Secret, and Okta domain that you copied earlier (use the copy to clipboard buttons in Okta). Be sure to drop the
-adminin your Okta domain e.g. https://brmlabs-admin.okta.com/ —> https://brmlabs.okta.com/ - Hit “Save”